Build a Udemy Clone with Strapi and Next.js (Part 1)
— Strapi, Next.js — 33 min read
Introduction
This article is part one of a blog series where we will build a Udemy clone with Strapi backend. At the end of the series our clone will have the following features:
- Manage course page where user can perform CRUD actions
- User authentication
- User progress tracking
- Rating system
- Cart & payment with Stripe
Demo:
Tutorial Outline
We will divide the series as follows:
- Part 1: Setting up Strapi & Next.js for public all courses & course overview page
- Part 2: Implementing user authentication, manage courses page & user progress
- Part 3: Implementing rating system, cart & payment with Stripe
We will use as little customization as possible, such as custom middleware and controller to achieve functionality that we want.
Prerequisites
Creating a New Strapi 5 Project
Run the following command to install Strapi
mkdir udemy-clone && cd udemy-clonenpx create-strapi-app@rc backend --quickstartAfter successful installation you will redirected to http://localhost:1337/admin/auth/register-admin
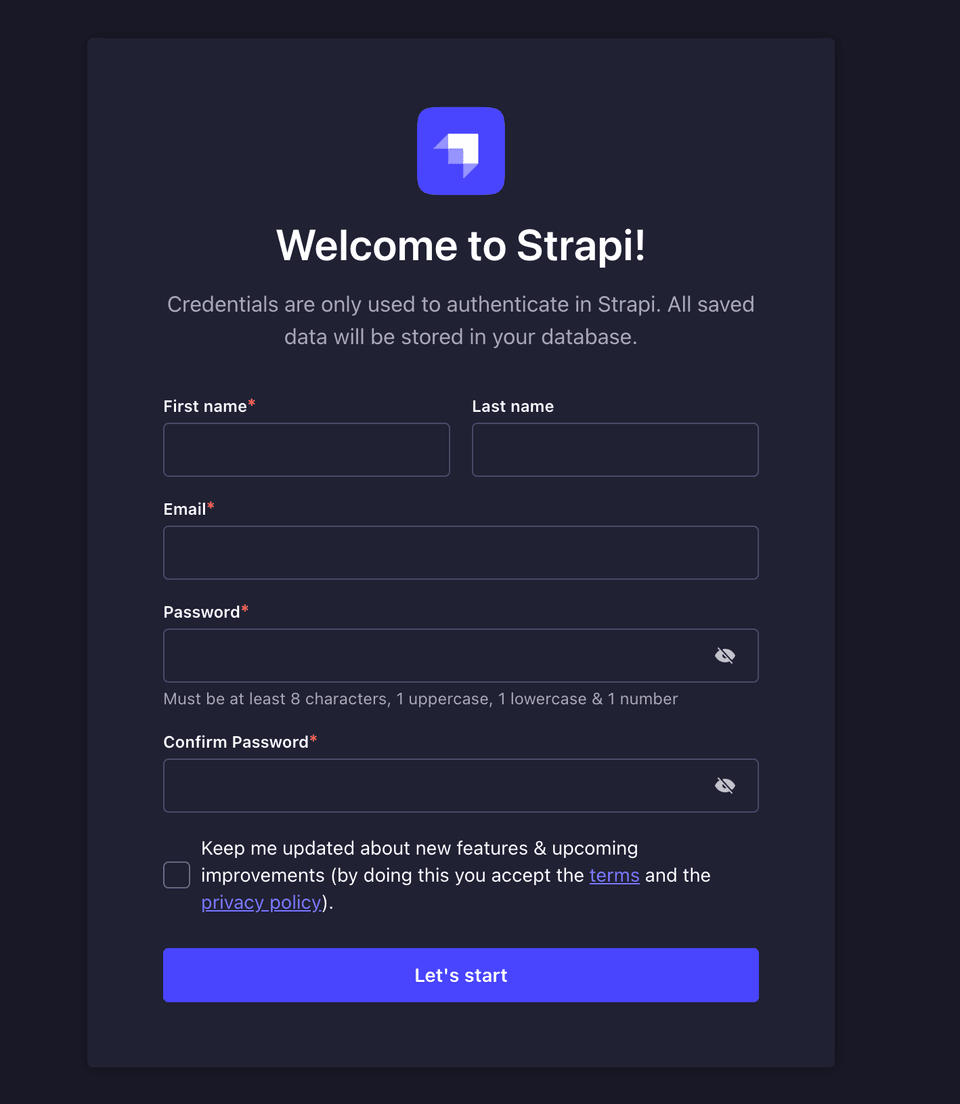
Fill the required information and you should get redirected to homepage
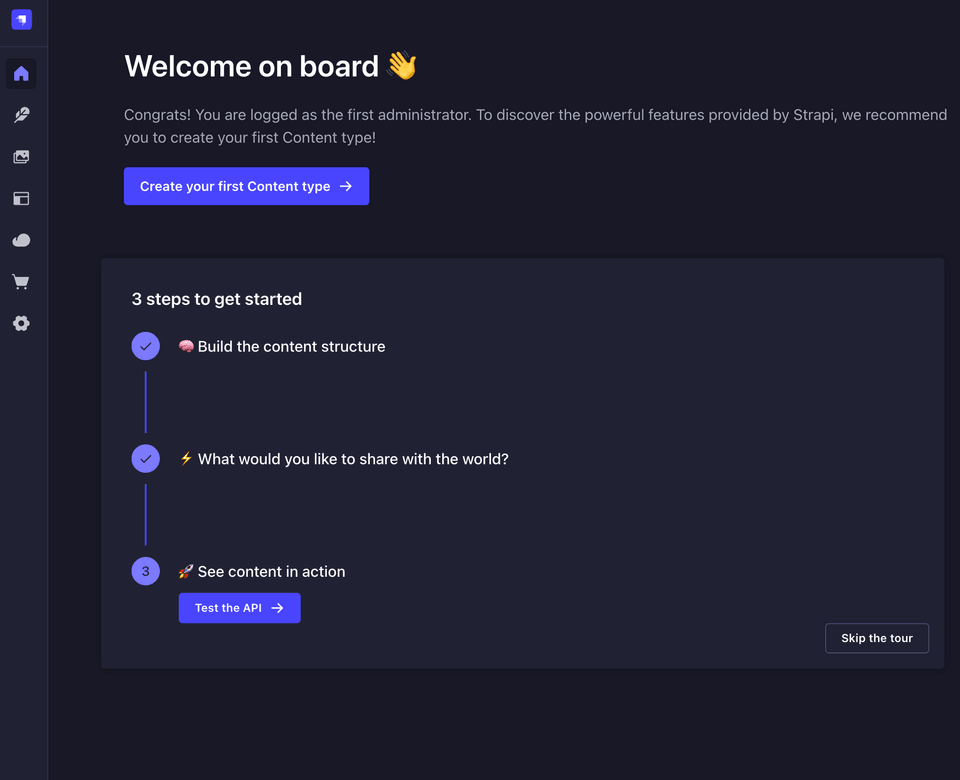
Strapi is ready to use!
Create and Configure Strapi Collection Types
1. Create Course Collection Type
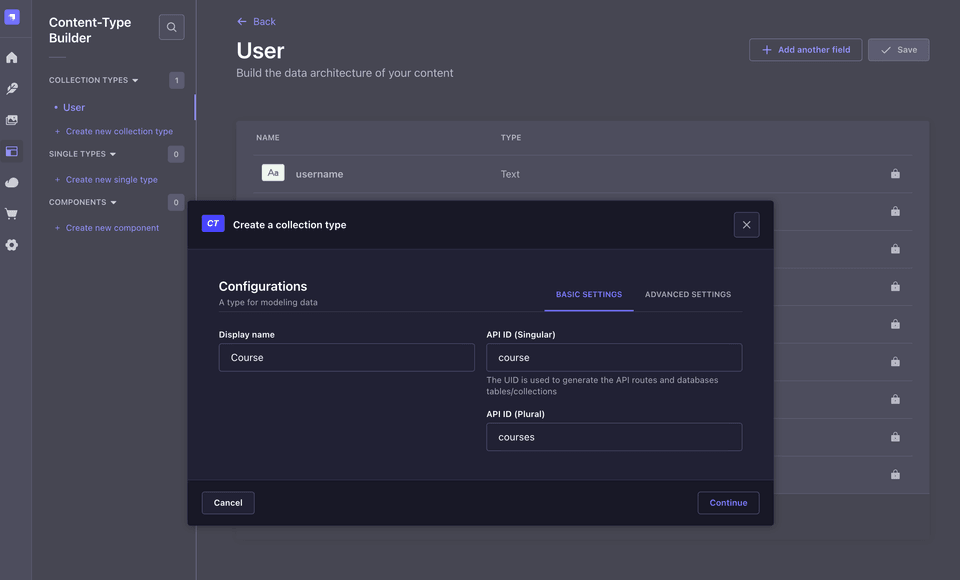
Go to Content-Type Builder and then click on Create new collection type.
Create a new collection type called Course
This collection has the following fields:
| Field Name | Data Type |
|---|---|
title | Text |
description | Text |
slug | Text |
thumbnail | Text |
category | Enumeration |
price | Number (Integer) |
isPurchased | Boolean |
Set default value of isPurchased to false in the advanced settings.
For the category field let's use the following as values, you can modify this to whatever values you like.
- Python
- Ruby
- Javascript
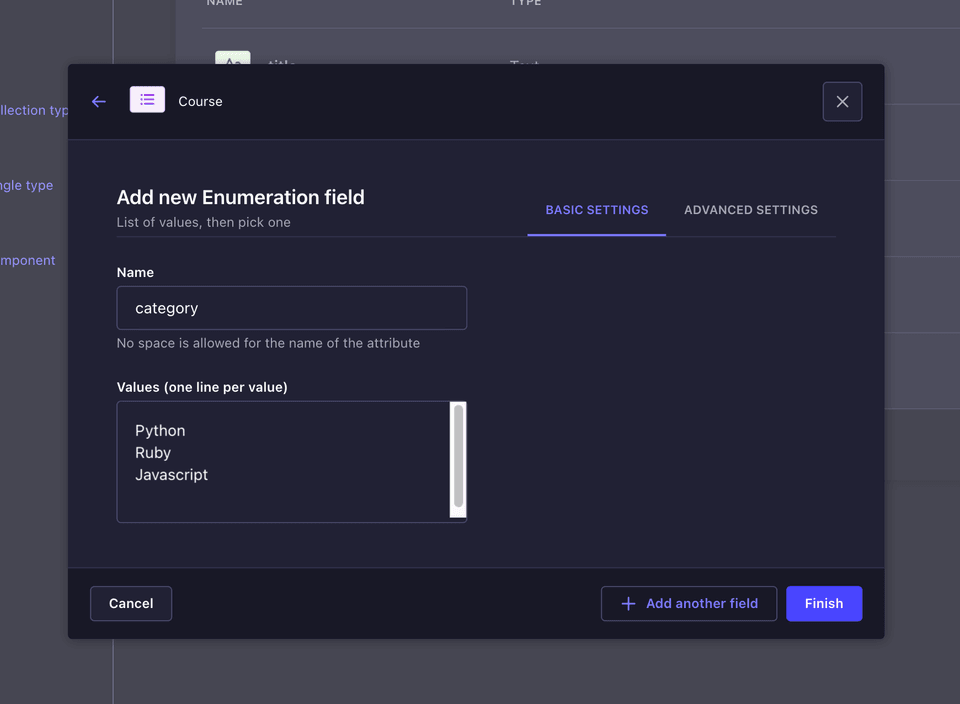
Then click 'Save'.
2. Create Section Collection Type
The Section collection type will contain the following fields:
| Field Name | Data Type |
|---|---|
title | Text |
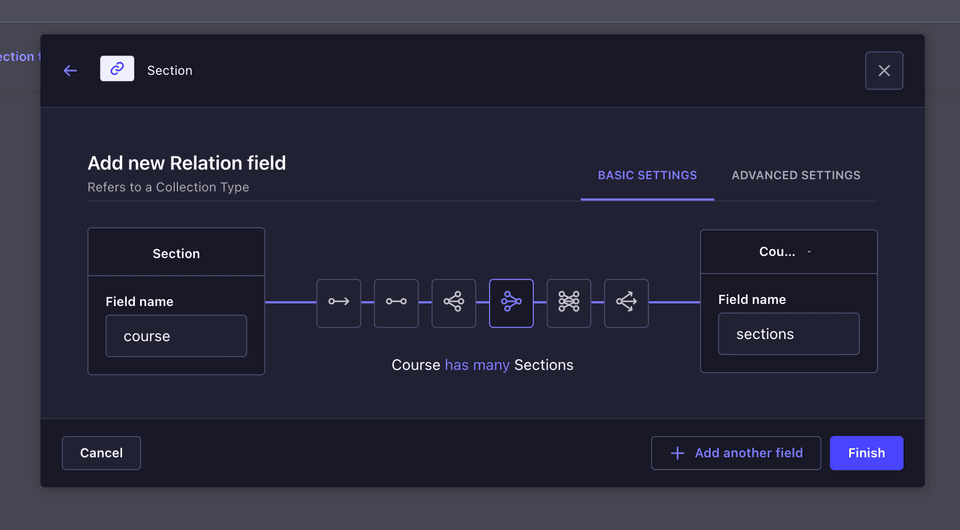
course | Relation |
For the course relation, select from the dropdown and choose Course has many Sections.
Then click 'Save'.
Pro tip
When you create a relation, create it in the child collection and not the parent. This will allow you to define the relations when creating an entry or document.
In this case, Section is the parent and Course is the child.
{ "data": { "name": SECTION_NAME, "course": { "connect": [DOCUMENT_ID_OF_THE_COURSE] } }}You can read more about it here.
For example here we have Course & Section Collection Types.
When you set the above relation, It will automatically create this relation in the Course collection type.
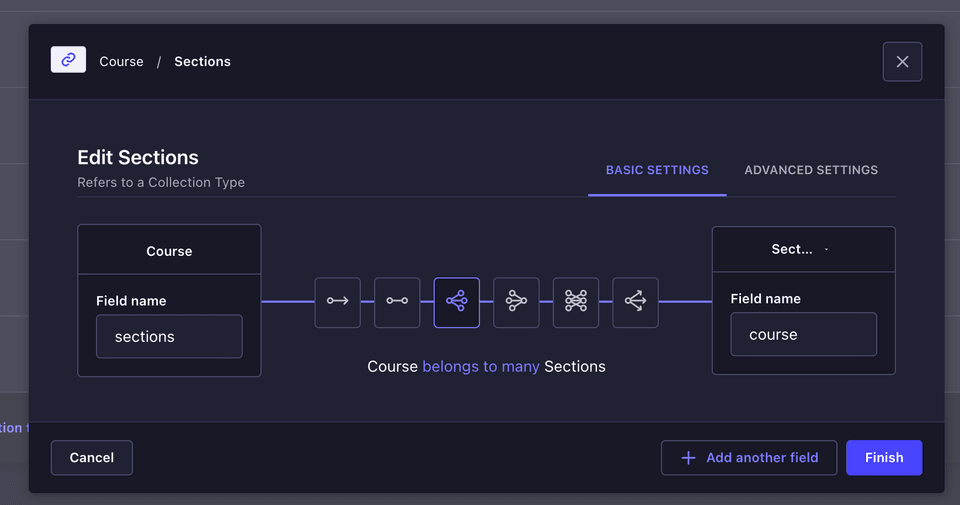
I made the mistake of putting it in parent the first time I tried it and it requires multiple API calls for connect, not to mention resulted in several bugs.
You can read more about understanding & using relations in Strapi.
3. Create Lecture Collection Type
Create the Lecture collection type with the following fields:
| Field Name | Data Type |
|---|---|
title | Text |
videoURL | Text |
duration | Number (Integer) |
section | Relations |
For the section relation, select from the dropdown and choose Section has many Lectures.
Then click 'Save'.
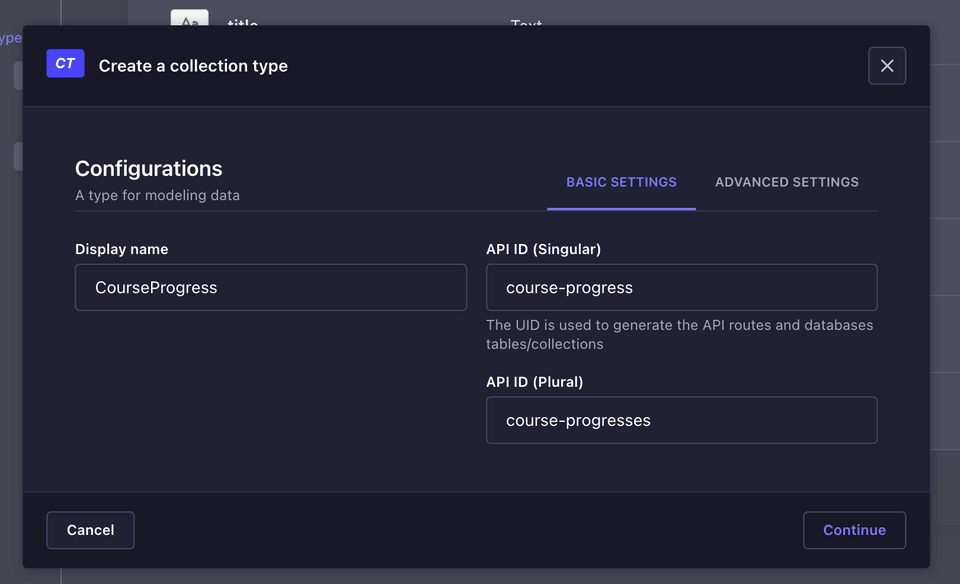
4. Create CourseProgress Collection Type
Create a new collection type called CourseProgress as shown in the image below.

CourseProgress collection will save user progress with the following fields:
| Field Name | Data Type |
|---|---|
user | Relation (User has many CourseProgresses) |
course | Relation (CourseProgress has one Course) |
completedLectures | JSON |
progressPercantage | Number (Integer) |
Configuring API Permissions in Strapi
Go to Users & Permission plugin > Roles > Public and enable find for Lecture, Section, Course, and CourseProgress collection types.
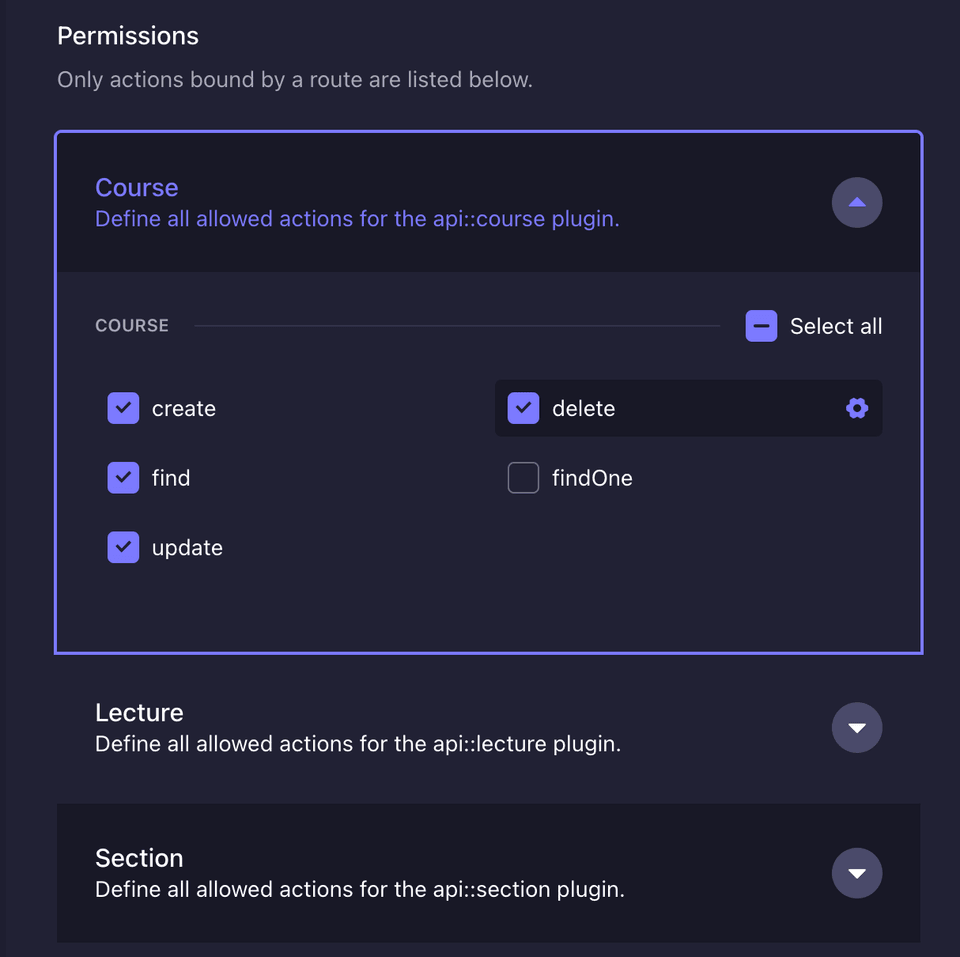
If permission is configured properly you will run into this problem when making a request to the Strapi API.
{ "data": null, "error": { "status": 403, "name": "ForbiddenError", "message": "Forbidden", "details": {} }}The error above is a forbidden error that is retured when you are do not have permission to access an API endpoint.
Configure User Permissions
Also, we need to enable find for User-permission, we need this to filter course progress that belong to a user.

Create Entries and Test API endpoints in Strapi
In Strapi admin dashboard, navigate to content manager and perform the following operations.
1. Create Course entry
Create a course entry with the following information:
title: Python Fundamentalsdescription: Designed for beginners who want to learn the basics of Python programming.slug: python-fundamentalsthumbnail: https://www.mooc.org/hubfs/python-applications.jpgcategory: Pythonprice: 12isPurchased: false
Leave the section relation empty and click publish.
2. Create section entry
Create a section entry with the following information:
title: Variables and Data Typescourse: select "Python Fundamentals" from dropdown
Leave the lecture relation empty.
3. Create lecture entry
Finally, create a lecture entry with the following information:
title: Python Data TypesvideoURL: https://www.youtube.com/embed/XMu46BRPLqAduration: 760section: select "Variables and Data Types" from the dropdown
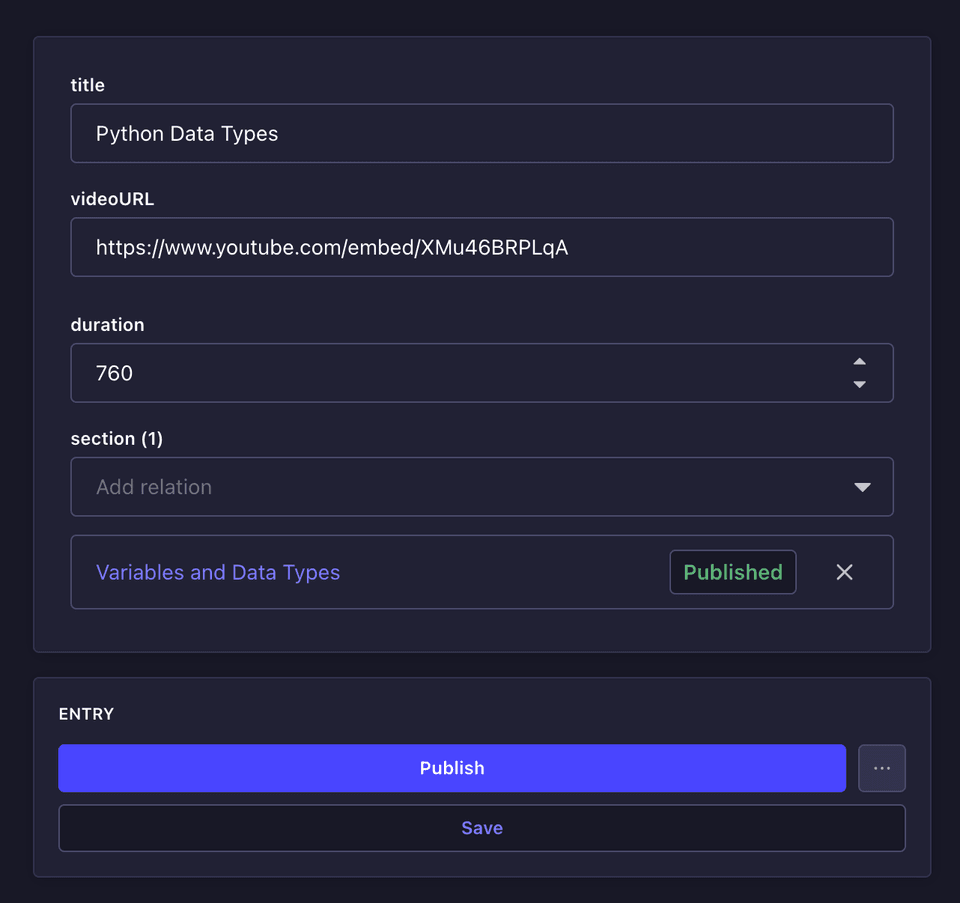
Then publish, you can add more entry but the concept is the same.
Testing the API endpoints
curl -X GET "http://localhost:1337/api/courses"
You should be able to get the following response:
[ { "id": 2, "documentId": "lqhace5xsr85ljkaq42zlwps", "title": "Python Fundamentals", "description": "Designed for beginners who want to learn the basics of Python programming. ", "slug": "python-fundamentals", "thumbnail": "https://www.mooc.org/hubfs/python-applications.jpg", "createdAt": "2024-09-14T19:48:28.552Z", "updatedAt": "2024-09-14T19:48:28.552Z", "publishedAt": "2024-09-14T19:48:28.730Z", "locale": null, "category": "Python" }]Setting up Next.js
Inside the udemy-clone folder, run the command below to create the latest version of Next.js. The command below will also install axios and start up our Next.js application.
npx create-next-app@latest frontendnpm i axioscd frontend && npm run devWe will use Tailwind CSS for the styling, you can opt out if you want to use your own styling.
Create All Courses Page: Building The UI and Integrating with Strapi
Inside the frontend/app/globals.css, change the preferred color scheme from dark to light.
@media (prefers-color-scheme: light) {Let's modify frontend/app/page.js.
"use client";import React, { useState, useEffect } from "react";import axios from "axios";import Link from "next/link";
const AllCoursesPage = () => { const [courses, setCourses] = useState([]); const [categories, setCategories] = useState({}); const [isLoading, setIsLoading] = useState(true);
useEffect(() => { const fetchCourses = async () => { try { const response = await axios.get("http://localhost:1337/api/courses"); const fetchedCourses = response.data.data;
const groupedCourses = fetchedCourses.reduce((acc, course) => { const category = course.category || "Uncategorized"; if (!acc[category]) { acc[category] = []; } acc[category].push(course); return acc; }, {});
setCourses(fetchedCourses); setCategories(groupedCourses); setIsLoading(false); } catch (error) { console.error("Error fetching courses:", error); } };
fetchCourses(); }, []);
if (isLoading) { return ( <div className="flex flex-col justify-center items-center h-screen"> <div className="animate-spin rounded-full h-32 w-32 border-t-4 border-b-4 border-blue-500"></div> <div className="text-2xl font-bold mt-6">Loading...</div> </div> ); }
return ( <div className="flex flex-col p-24"> <div> <Link href="/">Home</Link> </div> {!isLoading && courses.length === 0 ? ( <div>There are no courses available</div> ) : ( <div> {Object.keys(categories).map((category) => ( <div key={category} className="mt-12"> <h2 className="text-2xl font-semibold text-gray-800">{category}</h2> <div className="grid grid-cols-1 sm:grid-cols-2 lg:grid-cols-4 gap-6 mt-6"> {categories[category].map((course) => ( <a href={`/course/${course.slug}`} key={course.id} className="group block" > <div className="border border-gray-200 rounded-lg overflow-hidden cow-lg hover:shadow-xl transition-shadow duration-300"> <div className="relative w-full h-auto"> <img src={course.thumbnail} alt={course.title} className="group-hover:scale-105 transition-transform duration-300" /> </div> <div className="p-4"> <p className="text-lg font-semibold group-hover:text-blue-600"> {course.title} </p> <p className="text-sm text-gray-600 mt-2"> {course.description} </p> </div> </div> </a> ))} </div> </div> ))} </div> )} </div> );};
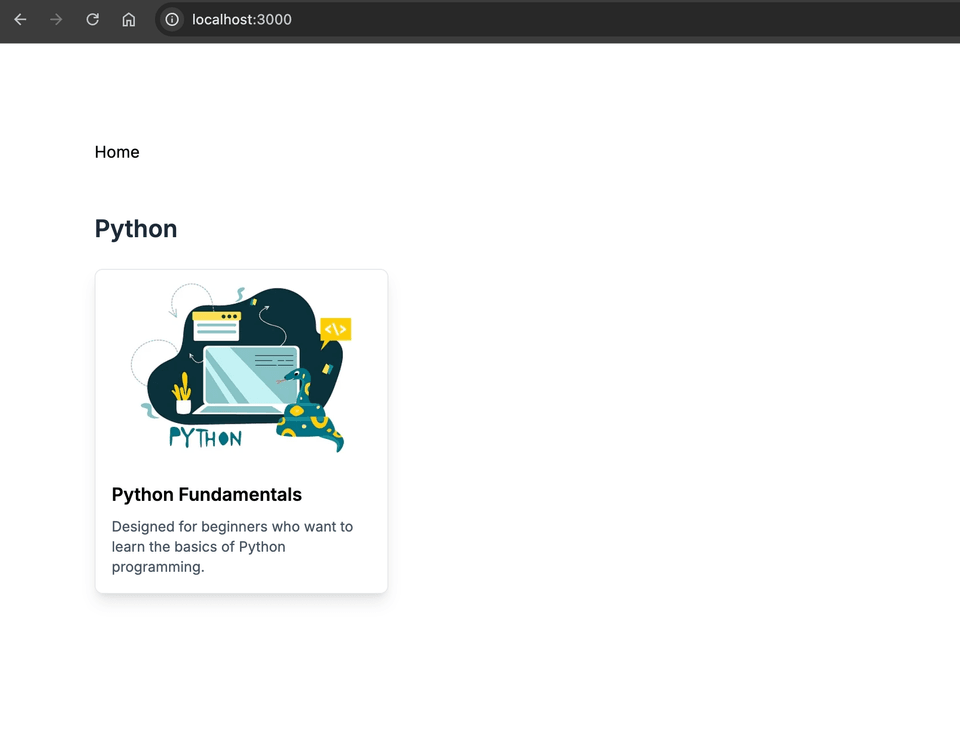
export default AllCoursesPage;In the code above:
- We fetch the course data with
axiosusing theGETHTTP method to Strapi API. - Next, we save the response in the states
categoriesandcourses. - Then we iterate through the
categorystate and display the course.
You should be able to see something like this
Create The Course Overview page
To create the Overview page, we have to create an accordion component in frontend/components/Accordion.jsx
"use client";import { useState } from 'react';
const Accordion = ({ course,secondsToHMS }) => { const [openSectionIndex, setOpenSectionIndex] = useState(0);
const toggleSection = (index) => { setOpenSectionIndex(openSectionIndex === index ? null : index); };
return ( <div className='border border-gray-300 mt-2'> {course.sections.length > 0 && course.sections.map((section, index) => { const isOpen = openSectionIndex === index; return ( <div key={section.id}> <div className="flex justify-between items-center cursor-pointer bg-gray-100 p-4 border-b border-gray-300" onClick={() => toggleSection(index)} > <h3 className="text-xl font-semibold text-gray-800"> {section.title} </h3> <span className={`text-sm text-gray-600 transition-transform duration-300 ${isOpen ? 'rotate-180' : 'rotate-0'}`}> ▼ </span> </div> {isOpen && ( <ul className="list-disc text-gray-700"> {section.lectures.length > 0 && section.lectures.map((lecture) => ( <li key={lecture.id} className="flex justify-between mt-1 py-6 px-12"> <span> {lecture.title}</span> <span className="text-sm text-gray-500"> {secondsToHMS(lecture.duration)} </span> </li> ))} </ul> )} </div> ); })} </div> );};
export default Accordion;In the code above we will render the list of course sections and their lectures with collapsible accordion. Users will be able to toggle sections as opened or closed.
Let's create the course overview page inside the frontend/app/course/[slug]/page.js file
"use client";import axios from "axios";import Accordion from "@/components/Accordion";import Link from "next/link";
async function getCourseBySlug(slug) { try { const response = await axios.get("http://127.0.0.1:1337/api/courses", { params: { filters: { slug: { $eq: slug, }, }, populate: { sections: { populate: "lectures", }, }, }, }); const course = response.data.data[0]; return course || null; } catch (error) { console.error("Error fetching course:", error); return null; }}
export default async function Page({ params }) { const course = await getCourseBySlug(params.slug); if (!course) { return ( <div> <h1>We can’t find the page you’re looking for</h1> <a href="/">Go back</a> </div> ); }
const getTotalLectures = () => { return course.sections.reduce( (total, section) => total + section.lectures.length, 0, ); };
const getTotalLecturesDuration = () => { const totalSeconds = course.sections.reduce((total, section) => { console.log(section.lectures, "section"); const sectionDuration = section.lectures[0]?.duration; return total + sectionDuration; }, 0); return secondsToHMS(totalSeconds); };
function secondsToHMS(duration) { const hours = Math.floor(duration / 3600); const minutes = Math.floor((duration % 3600) / 60); const seconds = duration % 60;
const hoursStr = hours > 0 ? `${hours}:` : ""; const minutesStr = minutes > 0 || hours > 0 ? String(minutes).padStart(2, "0") + ":" : ""; const secondsStr = String(seconds).padStart(2, "0");
return `${hoursStr}${minutesStr}${secondsStr}`; }
return ( <main className="flex flex-col p-24"> <Link href="/" className="text-blue-500 hover:underline"> Home </Link> <div className="max-w-5xl w-full p-8"> <div> <h1 className="text-4xl mb-6 font-bold text-gray-900"> {course.title} </h1>
<p className="text-lg text-gray-700 mb-8">{course.description}</p>
<h2 className="text-2xl font-bold mt-8 text-gray-800 pb-2"> Course Content </h2>
<ul className="flex gap-6 items-center text-sm text-gray-800 mt-4"> <li className="list-none"> {`${course.sections.length} sections`} </li> <li className="list-disc">{`${getTotalLectures()} lectures`}</li> <li className="list-disc"> {`${getTotalLecturesDuration()} total length`} </li> </ul>
<Accordion course={course} secondsToHMS={secondsToHMS} /> </div> </div> </main> );}In the code above:
- We fetch a course by it's slug and populate the sections and lectures response data.
You can read more about Strapi populate in https://docs-next.strapi.io/dev-docs/api/rest/populate-select
- The
getTotalLecturesDurationandsecondsToHMSare utility functions to convert duration to a readable format.
After storing the result in a useState hook, it will render the course content.
This the final result for part 1

Implement The Navbar Using Shadcn/UI
We will use Shadcn/UI to implement the Navbar. This will save us development time.
Install Shadcn/UI
In the frontend directory run the command below to install Shadcn/UI, add the avatar and button components and install lucide-react which is an implementation of the lucide icon library for React applications.
.
npx shadcn@latest initnpx shadcn@latest add avatar buttonnpm i lucide-reactYou will be prompted to create components.json. I'm using New York style, Neutral base color and without CSS variables but you can choose based on your preference.
Create a the file frontend/app/components/NavAvatar.jsx and add the following code:
"use client";import React, { useState } from "react";import { Avatar, AvatarImage, AvatarFallback } from "@/components/ui/avatar";import { Button } from "@/components/ui/button";import { useRouter } from "next/navigation";
const NavAvatar = ({ userData }) => { const router = useRouter(); const [isHovered, setIsHovered] = useState(false);
const handleMouseEnter = () => setIsHovered(true); const handleMouseLeave = () => setIsHovered(false);
const handleLogout = () => { localStorage.removeItem("token"); localStorage.removeItem("user"); router.push("/login"); };
const initials = userData.email.slice(0, 2).toUpperCase();
return ( <div className="relative flex items-center space-x-4" onMouseEnter={handleMouseEnter} onMouseLeave={handleMouseLeave} > <Avatar className="h-12 w-12"> <AvatarImage src="" alt={`${initials} Avatar`} /> <AvatarFallback className="bg-blue-500 text-white"> {initials} </AvatarFallback> </Avatar>
{isHovered && ( <div className="absolute top-12 right-0 bg-white border border-gray-200 rounded-md shadow-lg p-4 w-64 z-10" onMouseEnter={handleMouseEnter} onMouseLeave={handleMouseLeave} > <div className="flex flex-col items-center"> <Button onClick={handleLogout}>Logout</Button>
<span className="text-gray-500 block">{userData.username}</span> <span className="text-gray-500 block"> {userData.email}</span> </div> </div> )} </div> );};
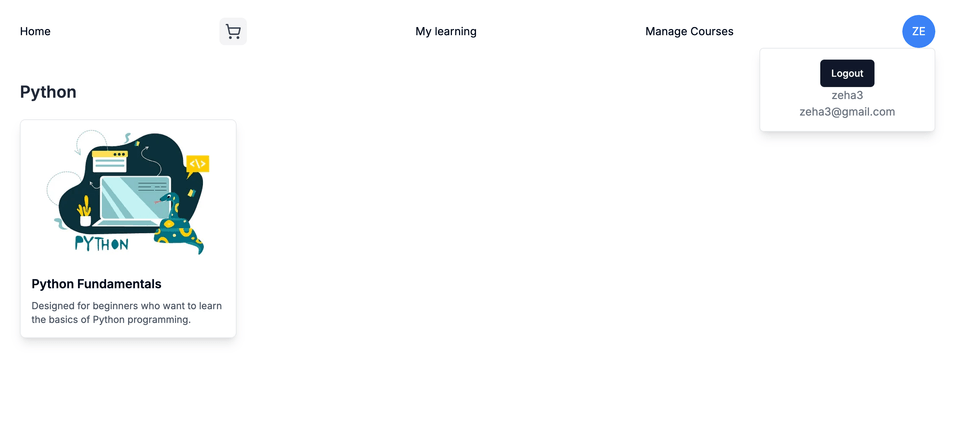
export default NavAvatar;In the code above we display user avatar's with their initial and use mouse events to provides hoverable dropdown menu.
After we are done setting up the Authentication part of this application, the NavAvatar will look like this
Create Navbar Component
Now let's create the Navbar component file frontend/app/components/Navbar.jsx and add the following code:
"use client";import { useState, useEffect } from "react";import NavAvatar from "@/app/components/NavAvatar";import { ShoppingCart } from "lucide-react";import Link from "next/link";
const Navbar = () => { const [userData, setUserData] = useState(null);
useEffect(() => { const userData = localStorage.getItem("user"); if (userData) { setUserData(JSON.parse(userData)); } }, []);
return ( <div className="flex items-center justify-between gap-12"> <div className="flex gap-4"> <Link href="/">Home</Link> </div> <Link href="/cart" className="flex items-center space-x-2 p-2 rounded-lg bg-gray-100 hover:bg-gray-200 transition-colors duration-200" aria-label="View Cart" > <div className="relative flex items-center"> <ShoppingCart size={24} className="text-gray-700" /> </div> </Link> {userData && <Link href="/my-learning">My learning</Link>} {userData && <Link href="/manage-courses">Manage Courses</Link>} {userData ? ( <NavAvatar userData={userData} /> ) : ( <div className="flex gap-4"> <Link href="/login">Login</Link> <Link href="/register">Register</Link> </div> )} </div> );};
export default Navbar;In the code above we checked the local storage if there is a user signed in. If user exist, we will render the authenticated version of the Navbar. If not, we will render the register and login link.
Now, we can replace the Home link with the ** Navbar** component in all courses page frontend/app/page.js and in the course overview page frontend/app/course/[slug]/page.js
Now, let's learn how to implement user authentication, manage courses page & track user course progress.
Implementing Authentication
In this section, we will take a look at the following:
- Setting up authentication
- Configuring user roles & permissions in Strapi
- Creating a register & login page, and then implementing authentication with Next.js
Create The AuthCheck Component
Let's create a component that we can reuse for multiple pages to check if there is an authenticated user.
frontend/components/AuthCheck.jsx
import React, { useEffect } from 'react';import { useRouter } from 'next/navigation';
const AuthCheck = () => { const router = useRouter();
useEffect(() => { const token = localStorage.getItem('token'); if (token) { router.push('/'); } }, [router]);
return null;};
export default AuthCheck;With this component we will have the ability to check if there is authenticated user and if not we can redirect the user to the home page.
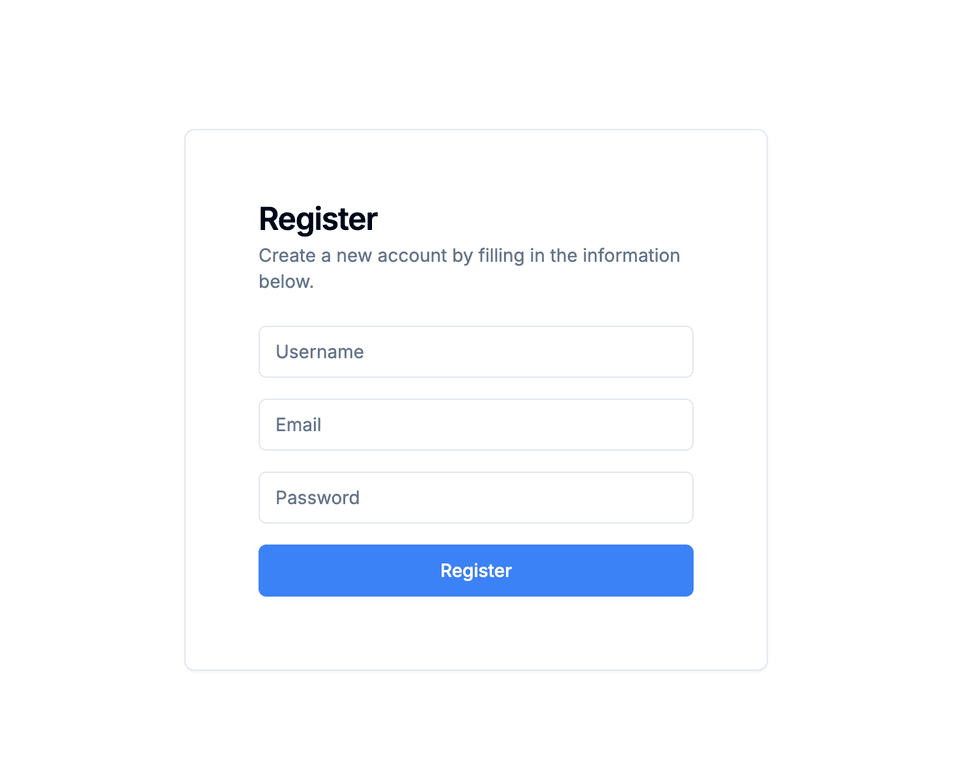
Create The Registration Page
Now we need to creat the registration page that will allow users register and use our app.
Let's start by adding a card and an input via Shadcn/UI.
npx shadcn@latest add card inputnpm i js-cookieModify the code inside the frontend/app/register/page.js file with the code below:
"use client";import React, { useState } from 'react';import { Button } from "@/components/ui/button";import { Input } from "@/components/ui/input";import { Card, CardHeader, CardTitle, CardContent, CardDescription } from "@/components/ui/card";import axios from 'axios';import AuthCheck from '@/components/AuthCheck';import { useRouter } from 'next/navigation';
const RegisterPage = () => { const [username, setUsername] = useState(''); const [email, setEmail] = useState(''); const [password, setPassword] = useState(''); const [error, setError] = useState(''); const [success, setSuccess] = useState(''); const router = useRouter();
const handleRegister = async (e) => { e.preventDefault();
try { const response = await axios.post('http://localhost:1337/api/auth/local/register', { username: username, email: email, password: password, });
const { jwt, user } = response.data;
localStorage.setItem('token', jwt); localStorage.setItem('user', JSON.stringify(user));
setSuccess('Registration successful! You can now log in.'); setError(''); setUsername(''); setEmail(''); setPassword(''); router.push('/');
} catch (error) { console.error('Registration failed:', error); setError('Registration failed. Please try again.'); } };
return ( <div className="flex items-center justify-center h-screen"> <AuthCheck/> <Card className="w-full max-w-md p-8"> <CardHeader> <CardTitle>Register</CardTitle> <CardDescription>Create a new account by filling in the information below.</CardDescription> </CardHeader> <CardContent> <form onSubmit={handleRegister}> <div className="mb-4"> <Input type="text" placeholder="Username" value={username} onChange={(e) => setUsername(e.target.value)} required /> </div> <div className="mb-4"> <Input type="email" placeholder="Email" value={email} onChange={(e) => setEmail(e.target.value)} required /> </div> <div className="mb-4"> <Input type="password" placeholder="Password" value={password} onChange={(e) => setPassword(e.target.value)} required /> </div> {error && <p className="text-red-500 text-sm mb-4">{error}</p>} {success && <p className="text-green-500 text-sm mb-4">{success}</p>} <Button type="submit" className="w-full bg-blue-500 text-white"> Register </Button> </form> </CardContent> </Card> </div> );};
export default RegisterPage;In the code above we created a form that sends a POST request to the Strapi registeration endpoint /api/auth/local/register.
Upon successful registration, the user's JWT token and profile are saved to local storage, and then redirected to the Home page.
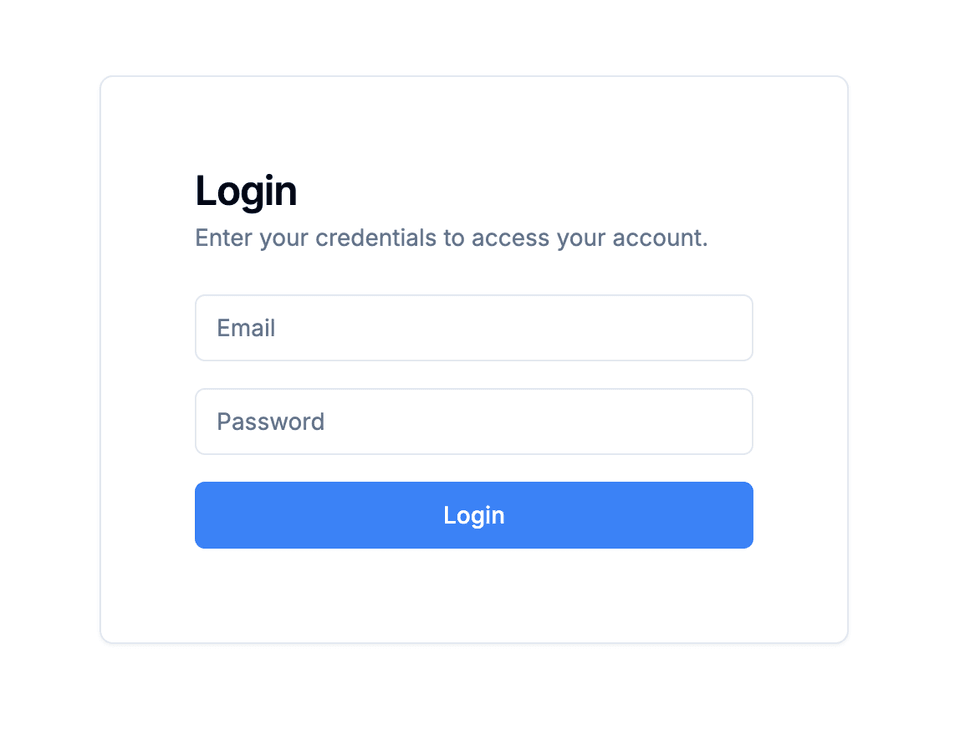
Create Login Page
Modify the code inside the frontend/app/login/page.js file with the following to create a Login page:
"use client";import React, { useState } from 'react';import { Button } from "@/components/ui/button";import { Input } from "@/components/ui/input";import { Card, CardHeader, CardTitle, CardContent, CardDescription } from "@/components/ui/card";import { useRouter } from 'next/navigation';import axios from 'axios';
const LoginPage = () => { const [email, setEmail] = useState(''); const [password, setPassword] = useState(''); const [error, setError] = useState(''); const router = useRouter();
const handleLogin = async (e) => { e.preventDefault();
try { const response = await axios.post('http://localhost:1337/api/auth/local', { identifier: email, password: password, });
const { jwt, user } = response.data; localStorage.setItem('token', jwt); localStorage.setItem('user', JSON.stringify(user));
router.push('/');
} catch (error) { console.error('Login failed:', error); setError('Invalid email or password.'); } };
return ( <div className="flex items-center justify-center h-screen"> <Card className="w-full max-w-md p-8"> <CardHeader> <CardTitle>Login</CardTitle> <CardDescription>Enter your credentials to access your account.</CardDescription> </CardHeader> <CardContent> <form onSubmit={handleLogin}> <div className="mb-4"> <Input type="email" placeholder="Email" value={email} onChange={(e) => setEmail(e.target.value)} required /> </div> <div className="mb-4"> <Input type="password" placeholder="Password" value={password} onChange={(e) => setPassword(e.target.value)} required /> </div> {error && <p className="text-red-500 text-sm mb-4">{error}</p>} <Button type="submit" className="w-full bg-blue-500 text-white"> Login </Button> </form> </CardContent> </Card> </div> );};
export default LoginPage;In the code above we created a form that sends a POST request to the Strapi login endpoint /api/auth/local.
If the login is successful, the user's JWT token and profile are saved to local storage, and then redirected to the home page.
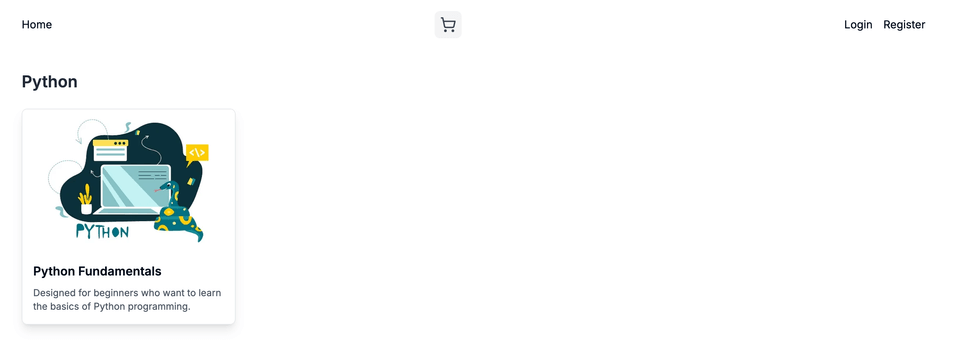
Now, a user should be able to see the Navbar if they are authenticated.
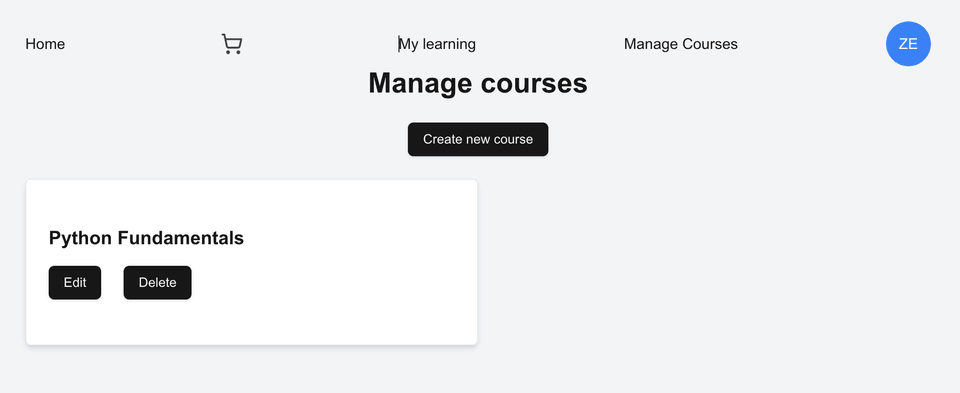
Create The Manage Courses page
Building UI for CRUD actions
Create the file frontend/app/manage-courses/page.jsx that will allow us manage courses.
"use client";import Navbar from "@/components/Navbar";import { useState, useEffect } from "react";import axios from "axios";import Link from "next/link";import { Button } from "@/components/ui/button";
const ManageCoursesPage = () => { const [courses, setCourses] = useState([]);
useEffect(() => { const fetchCourses = async () => { try { const response = await axios.get(`http://localhost:1337/api/courses`);
setCourses(response.data.data); } catch (error) { console.error(error); } };
fetchCourses(); }, []);
const handleDeleteCourse = async (documentId) => { const token = localStorage.getItem("token"); const config = { headers: { Authorization: `Bearer ${token}` }, }; try { await axios.delete( `http://localhost:1337/api/courses/${documentId}`, config, ); setCourses(courses.filter((course) => course.documentId !== documentId)); alert("Course deleted successfully"); } catch (error) { console.error(error); } };
return ( <div className="min-h-screen bg-gray-100 text-center p-24"> <Navbar /> <h1 className="text-3xl font-semibold mb-6">Manage courses</h1> <Button className="mb-6">Create new course</Button> <div className="flex flex-col items-start gap-6 w-1/2"> {courses.map((course) => ( <div className="py-12 pl-6 text-left w-full border text-card-foreground bg-white shadow-md rounded-md"> <h2 className="text-xl font-semibold mb-4">{course.title}</h2> <Link href={`/manage-courses/${course.slug}`} key={course.documentId} className="text-blue-500 mr-6" > <Button>Edit</Button> </Link> <Button onClick={() => handleDeleteCourse(course.documentId)}> Delete </Button> </div> ))} </div> </div> );};
export default ManageCoursesPage;In the code above, we fetch and display courses from Strapi endpoint. We also created handleDeleteCourse function to send DELETE request and then update the state accordingly.
Create Toast for Deleting and Editing a Course
Now we have the ability to display & delete courses.
The next feature to implement is for users to be able to create & edit course, and for that we will use a modal.
But before that let's replace the alert for deleting course with toast.
npx shadcn@latest add toastCurrently, the toast component from Shadcn/UI doesn't have a success variant, so we will create one. Update the variant in the frontend/components/ui/toast.jsx file with the following.
---success: "success group border-green-500 bg-green-500 text-neutral-50"---Inside the frontend/app/layout.js file, import the Toaster component:
import { Toaster } from "@/components/ui/toaster"
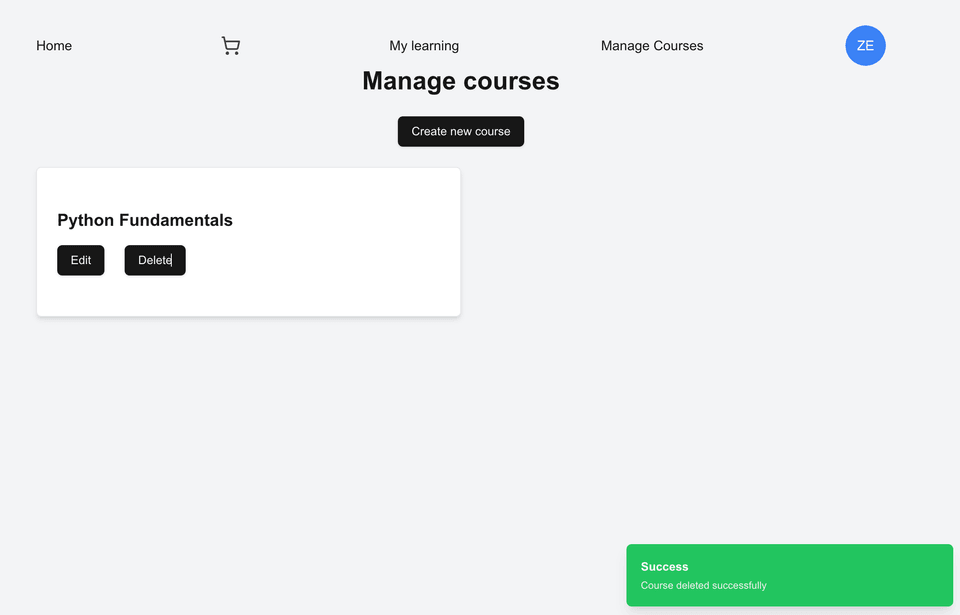
// below the {children}<Toaster />In frontend/app/manage-courses/page.jsx file, add the following code to configure the toast.
import { useToast } from "@/hooks/use-toast";
const { toast } = useToast();
// replace the alert withtoast({ title: "Success", description: "Course deleted successfully", duration: 3000, variant: "success",});You should be able to see the toast after deleting a course.
Create Modal for Editing and Deleting a Course
Now let's create a modal for editing and deleting a course. Create the file frontend/components/Modal.jsx and add the following code:
import React from "react";
export default function Modal({ isOpen, onClose, children }) { if (!isOpen) return null;
return ( <div className="fixed inset-0 bg-black bg-opacity-50 flex justify-center items-center z-50"> <div className="bg-white rounded-lg p-6 w-1/3"> <button onClick={onClose} className="text-black float-right font-bold" > × </button> <div>{children}</div> </div> </div> );}Now in the frontend/app/manage-courses/page.jsx file, import the modal above and add the following code:
import Modal from '@/components/Modal';
const [isModalOpen, setIsModalOpen] = useState(false);
const handleOpenModal = () => setIsModalOpen(true); const handleCloseModal = () => setIsModalOpen(false);
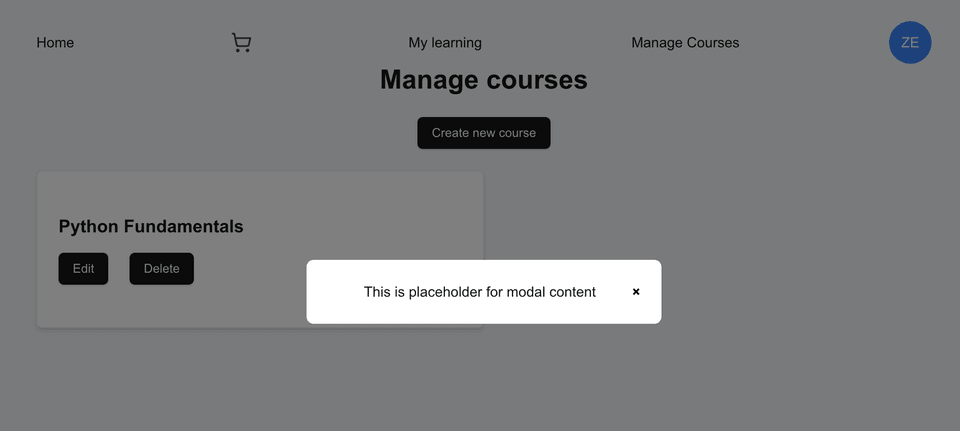
<Button className="mb-6" onClick={handleOpenModal}>Create new course</Button>
<Modal isOpen={isModalOpen} onClose={handleCloseModal}> <h1>This is placeholder for modal content</h1> </Modal>With the code above, when the "Create new course" button is clicked, you should be able to see the modal below:
Create Form for Create and Edit Course
Now we are ready to create a component to hold the form for create & edit course.
Create the file frontend/components/CourseForm.jsx and add the following code:
import React, { useState, useEffect } from "react";import axios from "axios";import { useToast } from "@/hooks/use-toast";import { useRouter } from 'next/navigation';
export default function CourseForm({ onClose, setCourses, existingCourse }) { const router = useRouter(); const { toast } = useToast(); const [formData, setFormData] = useState({ title: "", description: "", slug: "", thumbnail: "", sections: [], });
useEffect(() => { if (existingCourse) { setFormData({ title: existingCourse.title, description: existingCourse.description, slug: existingCourse.slug, thumbnail: existingCourse.thumbnail, }); } }, [existingCourse]);
const handleChange = (e) => { setFormData({ ...formData, [e.target.name]: e.target.value }); };
const handleSubmit = async (e) => { e.preventDefault(); const token = localStorage.getItem("token"); const config = { headers: { Authorization: `Bearer ${token}` }, };
const payload = { title: formData.title, description: formData.description, slug: formData.slug, thumbnail: formData.thumbnail, }
try { if (existingCourse) { const res = await axios.put( `http://127.0.0.1:1337/api/courses/${existingCourse.documentId}`, { data: payload }, config, ); toast({ title: "Success", description: "Course updated successfully", duration: 3000, variant: "success", }); router.push(`/manage-courses`);
} else { const res = await axios.post( "http://127.0.0.1:1337/api/courses", { data: payload }, config, ); toast({ title: "Success", description: "Course created successfully", duration: 3000, variant: "success", }); setCourses((courses) => [...courses, res.data.data]); onClose(); } } catch (error) { console.error("Error creating/editing course:", error); } };
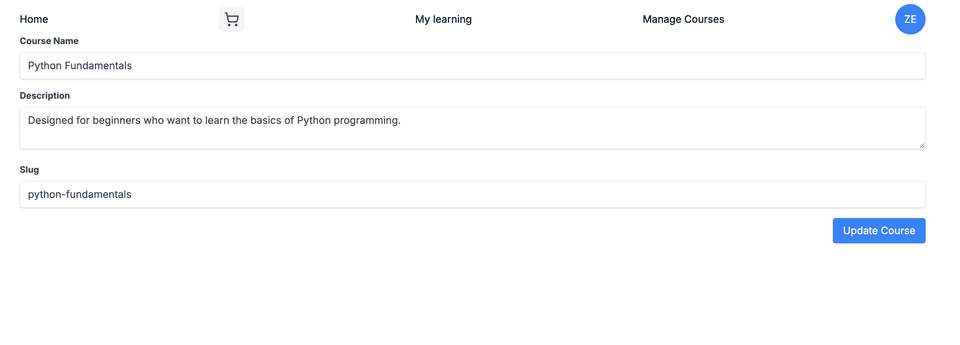
return ( <form onSubmit={handleSubmit}> <div className="mb-4"> <label className="block text-gray-700 text-sm font-bold mb-2"> Course Name </label> <input type="text" name="title" value={formData.title} onChange={handleChange} className="shadow appearance-none border rounded w-full py-2 px-3 text-gray-700" required /> </div> <div className="mb-4"> <label className="block text-gray-700 text-sm font-bold mb-2"> Description </label> <textarea name="description" value={formData.description} onChange={handleChange} className="shadow appearance-none border rounded w-full py-2 px-3 text-gray-700" required /> </div> <div className="mb-4"> <label className="block text-gray-700 text-sm font-bold mb-2"> Slug </label> <input type="text" name="slug" value={formData.slug} onChange={handleChange} className="shadow appearance-none border rounded w-full py-2 px-3 text-gray-700" required /> </div> <div className="mb-4"> <label className="block text-gray-700 text-sm font-bold mb-2"> Thumbnail </label> <input type="text" name="thumbnail" value={formData.thumbnail} onChange={handleChange} className="shadow appearance-none border rounded w-full py-2 px-3 text-gray-700" /> </div> <div className="flex justify-end"> {!existingCourse && ( <button type="button" onClick={onClose} className="bg-gray-400 text-white px-4 py-2 rounded mr-2" > Cancel </button> )} <button type="submit" className="bg-blue-500 text-white px-4 py-2 rounded" > {existingCourse ? "Update Course" : "Create Course"} </button> </div> </form> );}This component will allow users to create and update course details via a form. The form will either send a POST request to create a new course or a PUT request to update an existing one.
Now inside the frontend/app/manage-courses/page.jsx file, import the form we created above:
import CourseForm from "@/components/CourseForm";
// replace the modal content placeholder with below<CourseForm onClose={handleCloseModal} setCourses={setCourses}Now users should be able to create a new course.

Create Page for Course Editing
For editing the course, we will create a separate page.
Create a frontend/app/manage-courses/[slug]/page.jsx file and add the following code:
"use client";import CourseForm from '@/components/CourseForm';import Navbar from "@/components/Navbar";import axios from "axios";
async function getCourseBySlug(slug) { try { const response = await axios.get("http://127.0.0.1:1337/api/courses", { params: { filters: { slug: { $eq: slug, }, }, populate: { sections: { populate: "lectures", }, }, }, });
const course = response.data.data[0]; return course || null; } catch (error) { console.error("Error fetching course:", error); return null; }}
export default async function EditCoursePage({ params}) { const course = await getCourseBySlug(params.slug);
if (!course) { return ( <div> <h1>We can’t find the page you’re looking for</h1> <a href="/">Go back</a> </div> ); }
return ( <main className="flex flex-col p-24"> <Navbar /> <CourseForm existingCourse={course}/> </main> );}In the edit course page, we will fetch course details based on slug and then populate the form. When a user click on "Update Course" button we will make a PUT request to modify the course.
Now let's deal with the more complicated part which is the section & lectures.
Managing Sections
Create Sections with Accordion
We will use Shadcn/UI accordion to make it collapsible and cleaner UI.
npx shadcn@latest add accordionModify the useEffect function to populate sections & lectures in frontend/components/CourseForm.jsx
useEffect(() => { if (existingCourse) { setFormData({ // existing code sections: existingCourse.sections .sort((a, b) => new Date(a.createdAt) - new Date(b.createdAt)) .map((section) => ({ ...section, lectures: section.lectures ? section.lectures .sort((a, b) => new Date(a.createdAt) - new Date(b.createdAt)) .map((lecture) => ({ ...lecture, documentId: lecture.documentId, })) : [], })), }); } }, [existingCourse]);Create Section Utils
After that let's put all utils related to section in here
frontend/lib/sectionUtils.js
import axios from "axios";
export const handleAddNewSection = (setFormData) => { setFormData((prevFormData) => ({ ...prevFormData, sections: [...prevFormData.sections, { title: "" }], }));};
export const handleDeleteSection = async (formData, setFormData, index,toast) => { const token = localStorage.getItem("token"); const config = { headers: { Authorization: `Bearer ${token}` }, }; const sectionId = formData.sections[index].documentId; await axios.delete( `http://127.0.0.1:1337/api/sections/${sectionId}`, config, ); setFormData((prevFormData) => ({ ...prevFormData, sections: prevFormData.sections.filter((section, i) => i !== index), })); toast({ title: "Success", description: "Section deleted successfully!", duration: 3000, variant: "success", });};
export const handleChangeSection = (setFormData,index, value) => { setFormData((prevFormData) => ({ ...prevFormData, sections: prevFormData.sections.map((section, i) => i === index ? { ...section, title: value } : section, ), }));};
export const handleSaveSection = async (formData,setFormData,index,existingCourseId,toast) => { const token = localStorage.getItem("token"); const config = { headers: { Authorization: `Bearer ${token}` }, };
const section = formData.sections[index]; const sectionPayload = { title: section.title, course: { connect: [existingCourseId], }, };
try { let res; if (section.documentId) { res = await axios.put( `http://127.0.0.1:1337/api/sections/${section.documentId}`, { data: sectionPayload }, config, ); } else { res = await axios.post( "http://127.0.0.1:1337/api/sections", { data: sectionPayload }, config, ); }
setFormData((prevFormData) => ({ ...prevFormData, sections: prevFormData.sections.map((s, i) => i === index ? { ...s, documentId: res.data.data.id } : s, ), }));
toast({ title: "Success", description: section.documentId ? "Section updated successfully!" : "Section saved successfully!", duration: 3000, variant: "success", }); } catch (error) { console.error("Error saving/updating section:", error); toast({ title: "Error", description: "Error saving/updating section. Please try again.", variant: "destructive", duration: 3000,1. `handleAddNewSection` }); }};Here is what the code above does:
-
handleAddNewSectionwill add a new empty section to UI by updating thesectionstate array. -
handleDeleteSectionwill send aDELETErequest and then update the state accordingly. -
handleChangeSectionwill update section title based on it's index insectionstate array. -
handleSaveSectionwill send eitherPOSTorPUTrequest and then update the state with the response.
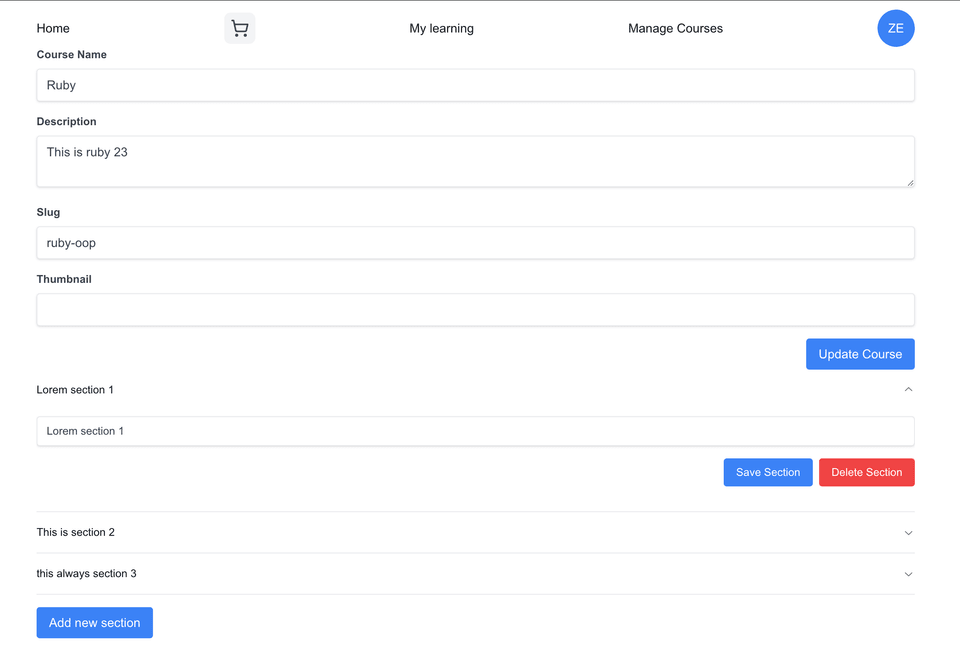
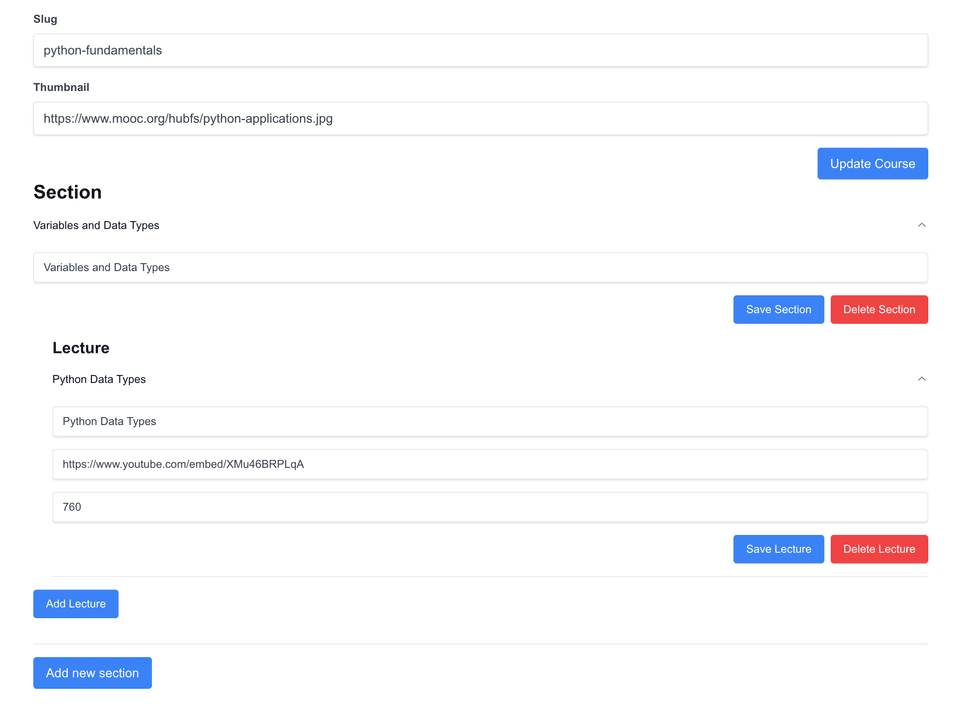
Now in frontend/components/CourseForm.jsx wrap the form element in a div, and then below the form add the following code.
import { Accordion, AccordionContent, AccordionItem, AccordionTrigger,} from "@/components/ui/accordion";
// put this below the form<Accordion type="single" collapsible className="w-full">{formData.sections.map((section, sectionIndex) => ( <AccordionItem key={sectionIndex} value={`section-${sectionIndex}`}> <AccordionTrigger className="text-left"> {section.title || `Section ${sectionIndex + 1}`} </AccordionTrigger> <AccordionContent> <div className="mb-4"> <input value={section.title} onChange={(e) => handleChangeSection(sectionIndex, e.target.value) } className="shadow appearance-none border rounded w-full py-2 my-2 px-3 text-gray-700" placeholder="Section title" /> <div className="flex justify-end space-x-2 mt-2"> <button type="button" onClick={() => handleSaveSection(sectionIndex)} className="bg-blue-500 text-white px-4 py-2 rounded" > Save Section </button> <button type="button" onClick={() => handleDeleteSection(sectionIndex)} className="bg-red-500 text-white px-4 py-2 rounded" > Delete Section </button> </div> </div> </AccordionContent> </AccordionItem>))}</Accordion>
<button type="button" onClick={handleAddNewSection} className="bg-blue-500 text-white px-4 py-2 rounded mt-4" > Add new section </button>Now we can perform CRUD action for the section.
Managing Lectures
Same as section, we will put the utils related to lectures in a separate file frontend/lib/lectureUtils.js
import axios from "axios";
export const handleAddLecture = (setFormData,sectionIndex) => { setFormData((prevFormData) => ({ ...prevFormData, sections: prevFormData.sections.map((section, index) => index === sectionIndex ? { ...section, lectures: [ ...(section.lectures || []), { title: "", videoURL: "", duration: 0 }, ], } : section, ), }));};
export const handleChangeLecture = (setFormData,sectionIndex, lectureIndex, field, value) => { setFormData((prevFormData) => ({ ...prevFormData, sections: prevFormData.sections.map((section, index) => index === sectionIndex ? { ...section, lectures: section.lectures.map((lecture, idx) => idx === lectureIndex ? { ...lecture, [field]: value } : lecture, ), } : section, ), }));};
export const handleDeleteLecture = async (setFormData,formData,toast,sectionIndex, lectureIndex) => { const token = localStorage.getItem("token"); const config = { headers: { Authorization: `Bearer ${token}` }, };
const lecture = formData.sections[sectionIndex].lectures[lectureIndex];
try { if (lecture.id) { await axios.delete( `http://127.0.0.1:1337/api/lectures/${lecture.documentId}`, config, ); }
setFormData((prevFormData) => ({ ...prevFormData, sections: prevFormData.sections.map((section, index) => index === sectionIndex ? { ...section, lectures: section.lectures.filter( (_, idx) => idx !== lectureIndex, ), } : section, ), })); toast({ title: "Success", description: "Lecture deleted successfully!", duration: 3000, }); } catch (error) { console.error("Error deleting lecture:", error); toast({ title: "Error", description: "Error deleting lecture. Please try again.", variant: "destructive", duration: 3000, }); }};
export const handleSaveLecture = async (setFormData,formData,toast,sectionIndex, lectureIndex) => { const token = localStorage.getItem("token"); const config = { headers: { Authorization: `Bearer ${token}` }, };
const lecture = formData.sections[sectionIndex].lectures[lectureIndex]; const lecturePayload = { title: lecture.title, videoURL: lecture.videoURL, duration: lecture.duration, section: { connect: [formData.sections[sectionIndex].documentId], }, };
try { let res; if (lecture.documentId) { res = await axios.put( `http://127.0.0.1:1337/api/lectures/${lecture.documentId}`, { data: lecturePayload }, config ); } else { res = await axios.post( "http://127.0.0.1:1337/api/lectures", { data: lecturePayload }, config ); }
setFormData((prevFormData) => ({ ...prevFormData, sections: prevFormData.sections.map((section, i) => i === sectionIndex ? { ...section, lectures: section.lectures.map((lec, j) => j === lectureIndex ? { ...lec, documentId: res.data.data.id } : lec ), } : section ), }));
toast({ title: "Success", description: lecture.documentId ? "Lecture updated successfully!" : "Lecture saved successfully!", duration: 3000, variant: "success", }); } catch (error) { console.error("Error saving/updating lecture:", error); toast({ title: "Error", description: "Error saving/updating lecture. Please try again.", variant: "destructive", duration: 3000, }); }};And then in frontend/components/CourseForm.jsx
// below the delete section button add<Accordion type="single" collapsible className="mt-4 ml-6"> {section.lectures && section.lectures.map((lecture, lectureIndex) => ( <AccordionItem key={lectureIndex} value={`lecture-${sectionIndex}-${lectureIndex}`} > <AccordionTrigger className="text-left"> {lecture.title || `Lecture ${lectureIndex + 1}`} </AccordionTrigger> <AccordionContent> <input value={lecture.title} onChange={(e) => handleChangeLecture( setFormData, sectionIndex, lectureIndex, "title", e.target.value, ) } className="shadow appearance-none border rounded w-full py-2 my-2 px-3 text-gray-700" placeholder="Lecture Title" /> <input value={lecture.videoURL} onChange={(e) => handleChangeLecture( setFormData, sectionIndex, lectureIndex, "videoURL", e.target.value, ) } className="shadow appearance-none border rounded w-full py-2 my-2 px-3 text-gray-700" placeholder="Video URL" /> <input type="number" value={lecture.duration} onChange={(e) => handleChangeLecture( setFormData, sectionIndex, lectureIndex, "duration", parseInt(e.target.value, 10), ) } className="shadow appearance-none border rounded w-full py-2 my-2 px-3 text-gray-700" placeholder="Duration (in seconds)" /> <div className="flex justify-end space-x-2 mt-2"> <button type="button" onClick={() => handleSaveLecture( setFormData, formData, toast, sectionIndex, lectureIndex, ) } className="bg-green-500 text-white px-4 py-2 rounded" > Save Lecture </button> <button type="button" onClick={() => handleDeleteLecture( setFormData, formData, toast, sectionIndex, lectureIndex, formData, ) } className="bg-red-500 text-white px-4 py-2 rounded" > Delete Lecture </button> </div> </AccordionContent> </AccordionItem> ))}</Accordion>
<button type="button" onClick={() => handleAddLecture(setFormData, sectionIndex)} className="bg-green-500 text-white px-4 py-2 rounded mt-4"> Add Lecture</button>Now a user can manage lectures easily.
npx shadcn@latest add checkboxCreate `frontend/app/my-learning/page.jsx
"use client";import React, { useState, useEffect } from "react";import axios from "axios";import Navbar from "@/components/Navbar";import Link from "next/link";
const MyLearningPage = () => { const [courseProgresses, setCourseProgresses] = useState([]); const [isLoading, setIsLoading] = useState(true);
useEffect(() => { const fetchCourseProgresses = async () => { try { const token = localStorage.getItem("token");
const currentUser = JSON.parse(localStorage.getItem("user")); const config = { headers: { Authorization: `Bearer ${token}` }, }; const response = await axios.get(`http://localhost:1337/api/course-progresses?filters[user][id][$eq]=${currentUser.id}&populate=course`,config); setCourseProgresses(response.data.data); setIsLoading(false); } catch (error) { console.error("Error fetching course progresses:", error); setIsLoading(false); } };
fetchCourseProgresses(); }, []);
if (isLoading) { return ( <div className="flex flex-col justify-center items-center h-screen"> <div className="animate-spin rounded-full h-32 w-32 border-t-4 border-b-4 border-blue-500"></div> <div className="text-2xl font-bold mt-6">Loading...</div> </div> ); }
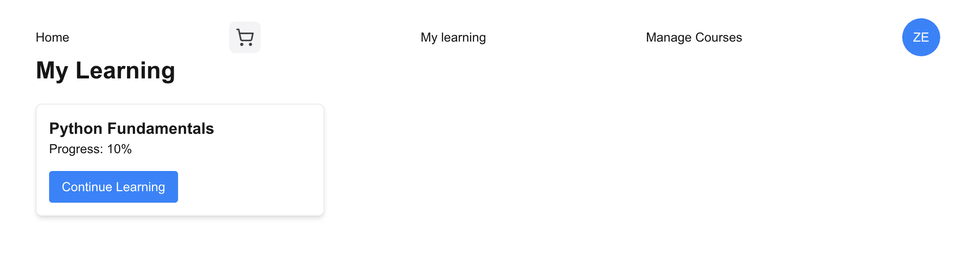
return ( <main className="flex flex-col px-24 pt-12 bg-white w-full"> <Navbar /> <h1 className="text-3xl font-bold mb-6">My Learning</h1> {courseProgresses.length === 0 ? ( <p>You haven't started any courses yet.</p> ) : ( <div className="grid grid-cols-1 sm:grid-cols-2 lg:grid-cols-3 gap-6"> {courseProgresses.map((progress) => ( <div key={progress.id} className="border rounded-lg p-4 shadow-md"> <h2 className="text-xl font-semibold">{progress.course.title}</h2> <p>Progress: {progress.progressPercentage}%</p> <Link href={`/my-learning/${progress.course.slug}`} className="mt-4 inline-block bg-blue-500 text-white px-4 py-2 rounded hover:bg-blue-600" > Continue Learning </Link> </div> ))} </div> )} </main> );};
export default MyLearningPage;In MyLearning page above we fetches user's course progress and display that information along with "Continue Learning" button to navigate to the course watch page.
Let's create the course watch page, but first we need a loader component to display while we are fetching the data.
frontend/components/Loader.jsx
import React from 'react'
const Loader = () => { return ( <div className="flex flex-col justify-center items-center h-screen"> <div className="animate-spin rounded-full h-32 w-32 border-t-4 border-b-4 border-blue-500"></div> <div className="text-2xl font-bold mt-6">Loading...</div> </div> );}
export default Loader;Now for the page
frontend/app/my-learning/[courseSlug]/page.jsx
"use client";import Navbar from "@/components/Navbar";import axios from "axios";import { useState, useEffect, useCallback } from "react";import { Checkbox } from "@/components/ui/checkbox";import Loader from "@/components/Loader";
export default function WatchCoursePage({ params }) { const [course, setCourse] = useState(null); const [userProgress, setUserProgress] = useState([]); const [completedLectures, setCompletedLectures] = useState([]); const [courseProgressId, setCourseProgressId] = useState(null);
const [selectedVideoId, setSelectedVideoId] = useState(); const [isLoading, setIsLoading] = useState(true);
useEffect(() => { setSelectedVideoId(course?.sections[0]?.lectures[0]?.videoURL); }, [course]);
useEffect(() => { const fetchCourseAndProgress = async () => { try { const courseResponse = await axios.get( "http://127.0.0.1:1337/api/courses", { params: { filters: { slug: { $eq: params.courseSlug, }, }, populate: { sections: { populate: "lectures", }, }, }, }, ); const courseData = courseResponse.data.data[0]; setCourse(courseData); setIsLoading(false); const token = localStorage.getItem("token"); const currentUser = localStorage.getItem("user"); const currentUserId = JSON.parse(currentUser).id; const config = { headers: { Authorization: `Bearer ${token}` }, }; const userProgressResponse = await axios.get( `http://localhost:1337/api/course-progresses?filters[user][id][$eq]=${currentUserId}`, { ...config, }, );
const userProgressData = userProgressResponse.data.data; setUserProgress(userProgressData); setCourseProgressId(userProgressData[0]?.documentId);
const completedLecturesData = userProgressData?.[0]?.completedLectures || []; setCompletedLectures(completedLecturesData); } catch (error) { console.error("Error fetching data:", error); } };
fetchCourseAndProgress(); }, [params.courseSlug]);
const handleCheckboxChange = useCallback( async (lectureId, isChecked) => { try { const token = localStorage.getItem("token"); const config = { headers: { Authorization: `Bearer ${token}` }, };
let updatedCompletedLectures; if (isChecked) { updatedCompletedLectures = [...completedLectures, lectureId]; } else { updatedCompletedLectures = completedLectures.filter( (id) => id !== lectureId, ); }
const totalLectures = course?.sections.reduce( (acc, section) => acc + section.lectures.length, 0, ) || 0; const completedCount = updatedCompletedLectures.length;
await axios.put( `http://localhost:1337/api/course-progresses/${courseProgressId}`, { data: { completedLectures: updatedCompletedLectures, progressPercentage: Math.round( (completedCount / totalLectures) * 100, ), }, }, config, );
setCompletedLectures(updatedCompletedLectures); } catch (error) { console.error("Error updating course progress:", error); } }, [completedLectures, courseProgressId], );
if (!isLoading && !course) { return ( <div> <h1>We can’t find the page you’re looking for</h1> <a href="/">Go back</a> </div> ); }
const handleSelectLecture = (videoId) => { setSelectedVideoId(videoId); };
if (isLoading) return <Loader />;
return ( <main className="flex flex-col pt-4 px-24 h-screen"> <Navbar /> <div className="flex justify-between w-full gap-12 pt-12 h-full"> <div className="flex flex-col h-full justify-start w-full"> <div className="w-full max-h-full h-3/4 "> <iframe className="block" width="100%" height="100%" src={selectedVideoId} title="Ultimate Guide To Web Scraping - Node.js & Python (Puppeteer & Beautiful Soup)" frameborder="0" allow="accelerometer; autoplay; clipboard-write; encrypted-media; gyroscope; picture-in-picture; web-share" referrerpolicy="strict-origin-when-cross-origin" allowfullscreen ></iframe> </div> <div> <h1 className="text-3xl mb-4 font-semibold">{course.name}</h1> <p className="">{course.description}</p> </div> </div> <div className="w-1/4"> {course.sections.length > 0 && course.sections.map((section) => { return ( <div key={section.id} className=""> <h2 className="text-xl font-semibold">{section.title}</h2> <ul className="list-disc"> {section.lectures.length > 0 && section.lectures.map((lecture) => { const isCompleted = completedLectures.includes( lecture.documentId, ); return ( <li className="flex items-center gap-6 mb-4 hover:bg-gray-400 p-2 rounded-md cursor-pointer" key={lecture.id} onClick={() => handleSelectLecture(lecture.videoURL) } > {lecture.title} <Checkbox checked={isCompleted} className="h-6 w-6" onCheckedChange={(checked) => handleCheckboxChange( lecture.documentId, checked, ) } onClick={(e) => e.stopPropagation()} /> </li> ); })} </ul> </div> ); })} </div> </div> </main> );}In the Watch Course page we display the video content along with checkbox that allow user to mark their progress.
Implementing Course search
Now let's implement a search so user can easily find a course that interest them.
First, we need a util function that will prevent the search to run too many times when user type
frontend/hooks/useDebounce.js
import { useState, useEffect } from 'react';
export function useDebounce(value, delay){ const [debouncedValue, setDebouncedValue] = useState(value);
useEffect(() => { const handler = setTimeout(() => { setDebouncedValue(value); }, delay);
return () => { clearTimeout(handler); }; }, [value, delay]);
return debouncedValue;}And then create frontend/components/SearchBar.jsx
import { Search } from "lucide-react";import Link from "next/link";import { Input } from "@/components/ui/input";
const SearchBar = ({ searchTerm, setSearchTerm, searchResults }) => ( <div className="relative w-full max-w-md"> <div className="relative"> <Search className="absolute left-2 top-1/2 transform -translate-y-1/2 text-gray-400" size={20} /> <Input type="text" placeholder="Search courses..." value={searchTerm} onChange={(e) => setSearchTerm(e.target.value)} className="pl-10 pr-4 py-2 w-full rounded-md border border-gray-300 focus:outline-none focus:ring-2 focus:ring-blue-500 focus:border-transparent" /> </div> {searchResults && searchResults.length > 0 && ( <div className="absolute z-10 w-full mt-1 bg-white border border-gray-300 rounded-md shadow-lg"> {searchResults.map((course) => ( <Link key={course.id} href={`/course/${course.slug}`} className="block px-4 py-2 hover:bg-gray-100" > {course.title} </Link> ))} </div> )} </div>);
export default SearchBar;Now modify Navbar.jsx to manage the state and render SearchBar.jsx
//... existing codeconst [searchTerm, setSearchTerm] = useState("");const [searchResults, setSearchResults] = useState(null);const debouncedSearchTerm = useDebounce(searchTerm, 300);
useEffect(() => { const storedUserData = localStorage.getItem("user"); if (storedUserData) setUserData(JSON.parse(storedUserData)); }, []);
useEffect(() => { if (!debouncedSearchTerm) { setSearchResults(null); return; }
fetch(`http://localhost:1337/api/courses?filters[title][$contains]=${debouncedSearchTerm}`) .then(response => response.json()) .then(data => setSearchResults(data.data || [])) .catch(error => { console.error("Error fetching search results:", error); setSearchResults([]); }); }, [debouncedSearchTerm]);Here's the result:
Conclusion
In this part we learned how to configure Strapi 5 and use it as a backend. How to create collection, it's relations and then create an entry.
We also learned how to build functional frontend for Udemy clone with Next.js.
In part 2, we will learn how to implement user authentication, manage courses page & user progress.
You can find the full code in https://github.com/ZehaIrawan/strapi-udemy-clone